Showing posts with label cotton ticking. Show all posts

Tuesday, February 19, 2019

Tuesday Tidbits!


First of all, I would like to request a favor from those of you who follow Buttermilk Basin's postings. She had a puzzle last week and I got the first two and forgot to grab the third one and she took it down. So if you have the third one, I would truly appreciate a copy.

I also made a pillow earlier, but couldn't show a photo, until it was gifted, so today I will show you what I made.

The saying is from Cheri Saffiote and I added a design by Kindred Spirits to personalize it. I wanted to give it a cleaner look and a ragged edge, so used heavier materials. It was fun to make and I do enjoy making personalized items for friends.


For the back I used an old ticking, that I had grunged up a bit.


This weekend was nice, the sun was out and not too cold. I bundle up and it gives me some time on the beach, before my hands freeze up. Even when I am sick, a few hours on the beach, makes me forget how miserable I am, lol.

There were no people on Saturday, so we had the beach to ourselves and lots of new glass to be found.


Sunday was a little cooler but a warm sun for a few hours. There are also more people on the beach, but no one seemed to be collecting glass, so more for me;) I love the olive greens and the bright greens will be used in projects for next Christmas.


We even found some new colors and pottery. The worn shell pieces will become angel wings.


And as an added treat, we stumbled onto a new friend. Not sure how to tell the sex of a seal, but it was quite happy to share the beach with us, as long as we kept our distance. It was nice to get out while we could and even if it wore me out a bit, it was good for my soul.

I am working on some more colored pencil pieces, so Friday I will have a review on the new products I am using.


Monday, February 13, 2017

Happy Valentines!


This weekend, I had to take it easy. At least it was snowing and the roads were horrible, so I didn't mind staying home for once. Since my arms are still a bit sore, working on my regular stitchery was a bit tough to do, so I made up a small quick project to do, just in time for Valentines.

I have a draw full of pre-cut pennies, so I picked some out and that saved on cutting them out. I picked a scrap piece of wool that is too thin to hook but has a nice purple hue with specks of colors thought and red hearts. I finished the smaller pennies with a simple wheel stitch to turn them into little yellow flowers with a triple french knot on top.

This is an easy project to do and you can make them in any size, using those little scraps of wool that you just don't want to throw away, turn them into pennies. If you have never made one, there are tutorials online and you can find circle templates to print out and trace. Freezer paper is the best for cutting out pennies, especially when you are making a bunch. I did get a circle cutter, still need to try that on wool.


And the winner of the pattern giveaway is..........  Lauren, of Rugs and Pugs! Congratulations Lauren, please email me,  your choice of pattern. I am hoping to get my runner finished this week, now that my arms are feeling better.

Friday, February 19, 2016

Friday Finish!


This week I worked on my new punch needle, still working on it but I did finish one stitchery. I wanted to make a larger cat piece for myself, just for fun, it makes me smile.

I added a few touches with fabric and some extra stitchery and made this one into a mini quilt. I use rug tape to hang them on the wall, an easy way to hang them and replace them when you want, without putting holes in the wall. It does work better with glossy paint, others tend to peel off with the tape.

I can never get the photos right, too dark or too light. I used extra walnut on this one to grunge it up. I also notice some blue in there, guess I need to rinse that out, sometimes the blue marker does not want to go away and I did use an iron on it when I did the fabric, so maybe that is causing it to stay.

I hope everyone has a nice weekend. We are getting some nice weather, so hoping to get out and do some walking.


And just for fun, for those who wonder what I looked like as a teenager, here is a blast from the past. That is my mom's dog and this is as hippie as I ever got, jeans and a t-shirt. I guess I got bored and dressed the pup in one of my nephew's outfits.


Friday, August 22, 2014

Friday Finishes!


Another slow week, I spent more time thinking about what to do, so I didn't start until later in the week.  One project I started was an old topper that my friend Kelley sent me. She made the top and I added the green edge for the border and binding. I thought the piece had a Christmas look so I can use it for the holidays.

I was going to practice my machine stitching with it, but decided I needed a simple hand project to work on while I do other things. I am using pearl cotton on this one and a simple stitch in the ditch with an X in the middle for the smaller blocks. They are 1 1/2" in size. The larger block is 4 1/2" and I am doing a stitch in the ditch around the edges, then an X and in-between that I am doing a diamond shape pattern. I thought that it would be simple enough and give it a bit of a snowflake look.

The red is a darker red and the materials are a mix of cotton and brushed cotton so it has a nice look on it's own, which means I won't be antiquing it. But you never know with me;)


 Another project I started is a Christmas piece called "Hand the Stockings", by Joann Mullay. My friend Karen has gifted me with her older patterns and I love using them, fun and quick to do. I have all the pieces ready to place and sew.


Monday, August 11, 2014

Monday Musings!


I hope everyone had a good weekend. We had beautiful weather but Bill is away, which means no one to carry the kayaks;) I was sick most of the week, so I couldn't do much anyways, but finally starting to get back to "my" normal again.

I forgot to show you a photo of the penny back so you could see how I attached them. I did the pennies first, then I lay them on a piece of ticking in a triangle pattern. Once I had them in the layout, I used a washable marker and made dots in the middle of the areas where the pennies lay, on the outside. Then I took my ruler and connected the dots. You can also make it larger by making it more on the outside of the pennies or a complete triangle back that you can lay your pennies on, it is up to you.

You can see the staining better, in this photo. I wanted the backing to be dark enough so that it blended with the pennies.


I also volunteered to babysit, not like my son had to twist my arm;) We had lots of fun together and he was being quite the ham, but it wore me out.

He seems to know what a camera is and loves to pose and be cute.


We spent some time outside. I found a great way to keep him still so I could rest, put him on the grass. He seems to have an aversion to grass, he just sits and plays in one spot, and of course, more silliness.


Then he started making this strange face and scrunching up his eyes, no idea what he is thinking when he does that, but our laughing seemed to be good reason, to do it over and over. Today I started two new projects, so I can work on the punch during the day and stitching at night, so I will be able to finish both by friday.


Friday, August 8, 2014

Friday Finish: Penny Rug!


This week I noticed a few people working on penny rugs and the diamond shape, in particular. I have always wanted to do one and since I have a box of precut pennies, I thought I would give it a try.

I went with the colors I had, and thought brown, green and orange were perfect for a fall piece. It is small so it is perfect for an end table or a candle mat for one of my bureaus. I sewed the pennies first, then I laid them out in the diamond pattern and marked off the batting so that it lay in the middle of the outer pennies. I used a piece of tan cotton ticking and sewed the pennies' outer edges to that.

After I finished it, I sat it in walnut stain, overnight. It was still lighter than I wanted, so I sprayed some extra walnut ink on the front and especially on the ticking, since that was lighter. Now it is nice and dark and has an antique look. I am not sure if that shows, as well in the photo.

This is a fun lap project while I watch television and I think it would be fun to make some for presents, this year. This mat is 15" long and 10" wide in the middle.


You can see some of the dark staining in the photo, and in person, the ticking is a dark brown. The pennies were precut, but I had to trim down the middle two circles as I went, so they are not perfect circles, but I like my pennies to be a little wonky;) A great project for the weekend and a great way to use up small scraps of wool.


Friday, January 17, 2014

Vintage Heart Quilt!


I have been working on my new heart piece and I finally finished the stitching tonight, so hopefully I can have it all done this weekend. I realized I didn't have much for valentines so trying a few new pieces this year before I move onto spring and summer pieces.

One thing I realized is, I had this quilt hanging on the ladder in my bedroom, I guess it fits well enough for a valentine piece. I am not sure if this was my first one, might be my second, but it was done in the 80's, so I guess it is vintage now. As you can see, I had no idea what I was doing, my hearts are wonky, the stitching is bad and I used tacks since I had no idea how to quilt.

The fun thing about this piece is I used clothing from my kids along with scrap fabrics. The kitty fabric was a pair of corduroy pants that my sister gave me. The red floral corduroy was my daughter's farmer jeans and some flannel and pant material from my son's cloths. Lots of memories.


This is a closer look at some of the fabrics, there are a few pieces of ticking. I used ticking a lot in my early days, especially for rag animal dolls. The materials are darker and more worn, since it was used at one point, but I notice some seams are coming apart, so I just display it now.


Wednesday, June 26, 2013

Liberty Lady!


I am still working on the baby quilt but almost done with the main quilting, then I will do the border. When I am working on a larger project, I like to do small things to take a break and have something I can finish quickly and there are a lot of fun, free patterns on the internet.

One place that has wonderful patterns is Bird in the Hand Primitives. Robin has wonderful free patterns that you can use in stitchery, punch needle or rug hooking. I have also done some in fabric as mini quilts, so something for everyone.

I made mine as a mini doll pillow, so I could add it to my americana setting. I kept it simple and sprayed  it with walnut spray to prim it up.

Today I found another free pattern that would be fun to do for next month and easy enough to do in a day. You can find it at Simply Put Plus. I think it would be fun in wool too, great item to make for your July fourth party.

This week I also checked out Bloglovin' and Feedly. I found Bloglovin to be the better of the two, it has a nicer layout and automatically sends a daily feed to my mailbox. Both are easy to set up, just a simple click to transfer your blogs.


Friday, June 7, 2013

Patriotic Mini Quilt!


Voting is still open for Patriotic Quilts at This-n-That Fabrics, be sure to place you vote. Just click on the vote button next to your favorite quilt. I was fortunate enough to win a gift certificate from a previous quilt contest that they had and one of the things I got was a mini pack of Old Glory Gatherings  .
I decided it was the perfect time to use it and make a mini quilt. I kept it simple and added a few appliques for fun. The basket from a Patek book, the flower from Whimsicals and the flag, I just added.

I am not sure if it is too busy? Too many of the same colors? It is pouring today, so I tried different lighting but I could not get rid of the contrasty look. I used all of the precuts, except for 4, so it shows what you can do with a mini pack.


Tuesday, June 4, 2013

Primitive Stars!


Voting is still open for Patriotic Quilts! Visit This-n-That Fabrics and scroll down to view the quilts, vote for your favorite!

I wanted to make some new things to decorate with and I had this pattern, by Buttermilk Basin. They are a nice size, so great for those areas where  you want something a little extra. I used cotton ticking for the fronts and antiqued them with walnut spray. Now that it is nice out, I use the sun to dry them and save on the electric bill.

I put them here for now, so you could see how they look in a setting and to show the size. The penny rug on the bench is one of my designs, I made a few different styles and one of these days, I will make them into patterns.


And here is a closer look. I had fun making them and think it would be fun to do some smaller ones.


Friday, May 31, 2013

Patriotic Bowl Fillers!


Today I wanted to make something fun and quick to do a little decorating. With the cabinets being redone, it is hard to keep the house clean and redo things for the season, but there are some spots I can play with that don't get messed up by my husband.

I wanted something to use as bowl fillers, so I tried two different ornies. One is the flag pillows, a quick and easy project. I used red and white ticking for the flag, then I sewed a backing onto it and lightly stuffed it. I sewed the star onto the blue piece and put that on with a simple running stitch.

I wanted to make a rag flag to put in the basket, but didn't have time today, so I put a piece of blue ticking in it, for now. It looks light in the photo, but it has been antiqued and a lot darker in person. A couple of rag balls and a few things I had in the house and I have a little setting for the top of my chest.

The Patriotic mouse is a piece that I won from Ragpatch Primitives.


The firecrackers I made by using scraps, so the size was dependent on what I grabbed. They measure about 6" x 2". I sewed them on the machine and left the tops open, then added a piece of jute for the fuse. They are stained with a combination of mahogany and walnut stain.


And of course, being the proud Grandma, I had to show a new photo of my grandson. Grandpa is holding him in his lap.


Friday, May 24, 2013

Union Cradle Quilt!


I wanted to make something fun for me and also a piece to enter into the contest at This-n-That Fabrics. The contest is for patriotic quilts and I have always wanted to make this design by Barbara Brackman. You can find the pattern in the book, Civil War Woman.

I soaked it it walnut crystals and tea but it didn't come out the way I wanted, so I laid it on the floor and sprayed it with my walnut ink. I wanted this one to look like an antique quilt and I really like how it came out. I used black pearl cotton to do the quilting. I also used fusi-boo for the batting. I really like how well it stays on and it has a nice soft touch.

I wanted to redo my office into a guest room and thought that a civil war soldier theme would be fun to design around. Something fun for a little boy and a place where I can display my husband's trains and steins.

I tried different shots, I think this quilt needs to be draped on something or part of a cradle display.
I reduced the blocks and applique by 20%, so my quilt came out as a 36" quilt.


Here is how it looks spread out. I could not get a good straight on shot or an outdoor shot, another rainy day. You can see the dark areas in the quilt, in person, it looks like a quilt that has been used and aged. I had to lighten it a bit so you could see the detail.


Friday, May 17, 2013

One of those weeks!


This week I planned on finishing the baby quilt. I had it all ready to quilt and that is when my machine decided to break, ugh. It seems the lever in the last thread slot is broken, so she is at the shop being fixed.

Then my husband goes down to the basement and there is water on the floor. An outside pipe is leaking and soaking into the basement, so we had to have our water shut off. The plumbers have to get a permit to dig in that area so they won't be back till monday. I spent one day learning how much I need running water, lol. Our neighbor let us hook a hose up to her house, so now we have water, though it smells like new hose, definitely not something I will use for drinking or cooking.

I worked on my quilt and decided to add my own touch. The original has stars and eagles but I wanted to add a little touch of my own to the borders and since it is americana, I went with red and yellow.

I tried getting a good shot, but the wind kept blowing it, but you can get the general idea. I will be doing black outline stitches around the appliques and in the blocks.

The design is by Barbara Brackman. It is called Union Cradle Quilt and can be found in her book, Civil  War Women.


Monday, May 13, 2013

New Project!


Yesterday I had a me day, nice quiet day all by myself and I wanted to make something just for fun. I have been wanting to make Barbara Brackman's , Union Cradle Quilt but wanted something I could make quick and easily, so I made a few changes.

First I reduced the block size to 6" instead of 8". Then I reduced the appliques by 20% on the scanner to fit with the new size. The original quilt is in two colors, but I wanted a patriotic quilt, so I used red and blue ticking for the blocks and a blue ticking for the border. The border is lighter than I would have used, but it was all I had that worked and I plan on tea staining the quilt, when it is finished. I also used wools for the appliqué and scraps that I had laying around. I want the quilt to be scrappy and old looking, when it is finished, so the wools are ones I cut out from old jackets.

I made the border a bit larger since it will have eagle appliques on it and when the quilt is done, I will use a part of the border as the binding by folding it to the backside.

I might just enter this one into the contest at This-n-That Fabrics. You can enter a patriotic quilt that you have made this year, has to be a new one and it ends this month.

The outer blue is a brushed homespun, but the flash makes it look shiny.


Monday, March 11, 2013

Little Chick Pillow!


Today I finished a pillow with the spring chick design that I won from Stacy of Buttermilk Basin. It is a fun design to do and since it is longer, I reduced it a bit to make a pillow to put in front of one of my wood boxes.

For this piece I used a white muslim and then antiqued it. I also added a little extra stitching and outlines, then I did a blanket stitch around the outer edge of the pillow.

I am not sure, but I think the new batting is causing the stains to pool in one spot.


And her is the back, I used a green  homespun and  you can see how the stain pooled in spots.


Tuesday, January 8, 2013

Valentine Crazy Hearts!


Since I am sick, I decided I needed something simple that I could do in my lap. I have made crazy hearts, but I wanted to try them differently, this time.

This is a great project to do if you want to use up scraps and have some bowl fillers for Valentines. I just used scraps in my basket, any colors will do.

With this method, I drew out a heart on a light fabric, and tracing it on the back, as well. This way you use the front side for the fabrics and when you go to sew it together, you have the design on the back, to follow.

I used a washable blue pen, but any pen will do, you won't see the lines.


I cut and laid out the pieces to see how they looked and just layered them on top of each other. Once I got the look I wanted, I glued the edges down, to make it easier for layering and sewing. I used a blanket stitch around the edges of the pieces, and using the heart on the back, I could look and see where my stitches ended, so I went past the heart shape, but not any further. Once the pieces are sewed down, you can trim off the excess.


I used red ticking for the back and sewed them, right sides together, using the tracing on the back as a guide. After it is sewed, cut a slit on the back and turn them, right sides out. After you stuff them, sew up the opening and cover it with a little tag. I stitched the word love on mine, then sewed the tag to the back with a prim straight stitch. I soaked mine in watered down, walnut ink. By mixing it with water, you can control how dark or light, you want the stain.


I also made another pillow, using a design by Primitive Blessings. These are fun to do and you can place them on shelves around the house, or give them as gifts to a friend.

I also found some new freebies that look like fun and thought I would share them.
Debbie Mumm has a really cute BOM with owls and flowers, would love to make this one.
Fat Cat Patterns has a new BOM for 2013, lots of fun fish blocks, another fun one for kids or a great beach quilt.
Marjory of Peck's Pieces has a wonderful snowman and santa quilt that is available for download and she is also doing some valentine pieces and other quilts to share with her readers, so she is definitely a great blog to follow.

Thursday, November 29, 2012

Snowmen Ornies!


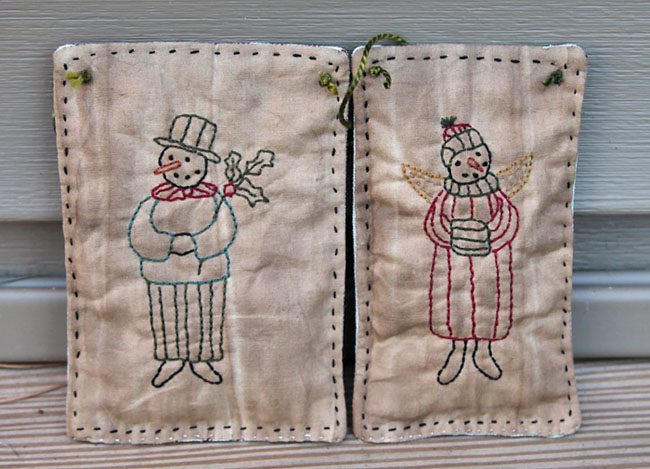
Yesterday I decided to make a couple of ornies to match my punched pieces. After I did the stitchery, I added a piece of batting and sewed that with the backing, rights sides together. Then I stitched around the edge and added a simple floss hanger. This was fun to do and worked up quick, and flat enough to add to a card. Great idea for any stitcheries you might have and an item you can put in a card, for that little extra.

I also added balsam fir to mine, since I wanted them scented, so it makes them a bit thicker. I also aged them ahead of time, since I didn't want to get the balsam wet.


Are you looking for the perfect gift for Christmas? Marylou Weidman is offering her book, Out of the Box, for half price and the money will go towards pajamas for the local homeless shelter. I think it is a wonderful idea and you would be  helping others as well as receiving a wonderful book. You can see more at her blog, Marylou and Whimsey Too!

Wednesday, May 2, 2012

Jeff Davis's Daughter Three!

I finished my third lady today, love the fabrics from Barbara's 1862 Battle Hymn fabric. It looks beautiful for the dresses and this quilt. Her flag stick is bent, I might fix it, I might not, lol. On this one, I added some laces, what do you think? I was thinking of adding the laces at the top, but I wanted to keep it simple and prim.

Also, for those of you who would like to win some goodies of your own, Chris at We Love Quilting is having another monthly giveaway. You won't be disappointed, she send wonderful boxes of goodies, a very generous lady.


Wednesday, April 25, 2012

Davis' Daughter Block Two!


I finished another block, only 4 more lady blocks and one for the middle section, guess I better work faster;) I am staying with the red and blue, mixed with tans and creams, so the dresses will be red, blue and brown shades. The next one will be in the brown family and I am using Barbara Brackman's 1862 Battle Hymn for the dresses and plan on using it for the border, if i can find some in the stores. I do like the look of the original pattern with blue and tans for the sashing and border prints.

I gave this lady, lighter hair and the green is a lighter shade. I am trying to keep them similar with a little bit of change, to mix it  up. I added an eye to this one, which I will do with all of them and I am thinking of adding laces to the boots.


Tuesday, December 20, 2011

The last of the Christmas Creations!

I made up a couple of small things this week to have in case I have unexpected company.
I always like a little something that I can give, just in case. If not, they will be for someone next year;)

The appliques I used for the pillows are from Cheri Saffiote Payne in her older book, 301 Christmas quilt blocks. You can still get copies of her two older books on ebay for good prices, and they are great for making gifts as well as some beautiful projects, that I will make someday.


These ornies I made up from a pattern on Create and Decorate. I found the pattern in their section for pattern corrections. It was for additional snowflake patterns in the December 2011 link. I used the snowflakes and made up some more penny ornies. I liked the patterns on these, nice designs to do up and a nice idea for next year, to add one inside a card or to a package.